
Introduction #
The Career Architect® is a customizable enterprise AI solution designed to ensure your brand takes center stage throughout your development efforts. You can now scale development support fully aligned to your values, culture, and models in the flow of work.
Each Career Architect is built in partnership with our team to align to your brand standards, and it ensures that every AI-Powered interaction is powered by the world’s largest database of talent development content (20,000 development tips and 15,000,000+ words of supporting content). Our solution has passed SOC II Type II and is hosted on AWS.
For more information on The Career Architect® please click here.
Step 1: Getting Access to the Career Architect #
If you are interested in having our team design and deploy the Career Architect, reach out to info@talenttelligent.com.
Step 2: Adding Career Architect Learners #
Each Career Architect learner will cost a Career Architect Credit:
- To learn how to check how many Career Architect Credits you have in your Digital Inventory, please click here.
- For more information about purchasing Career Architect Credits, please click here.
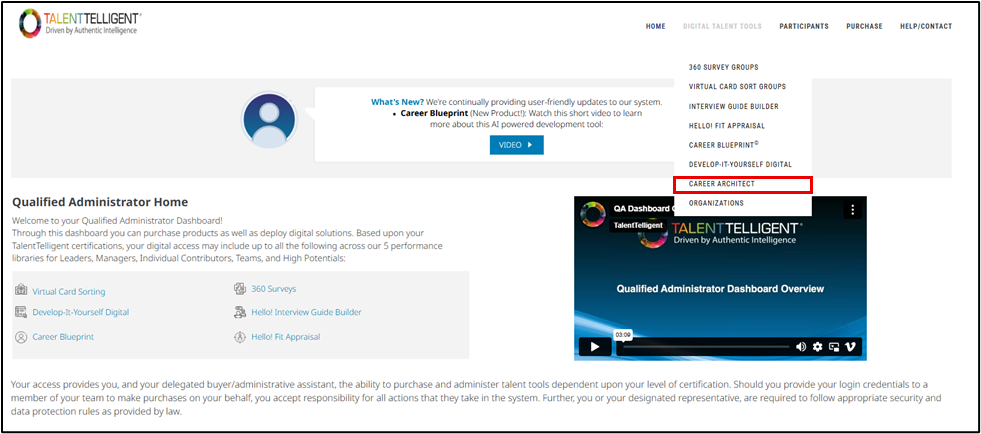
From the Qualified Administrator Home, go to Digital Talent Tools → Career Architect.
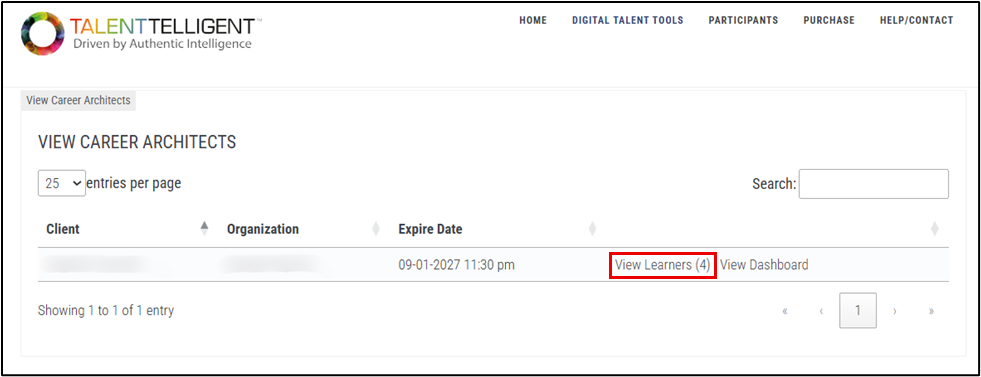
Select View Learners.
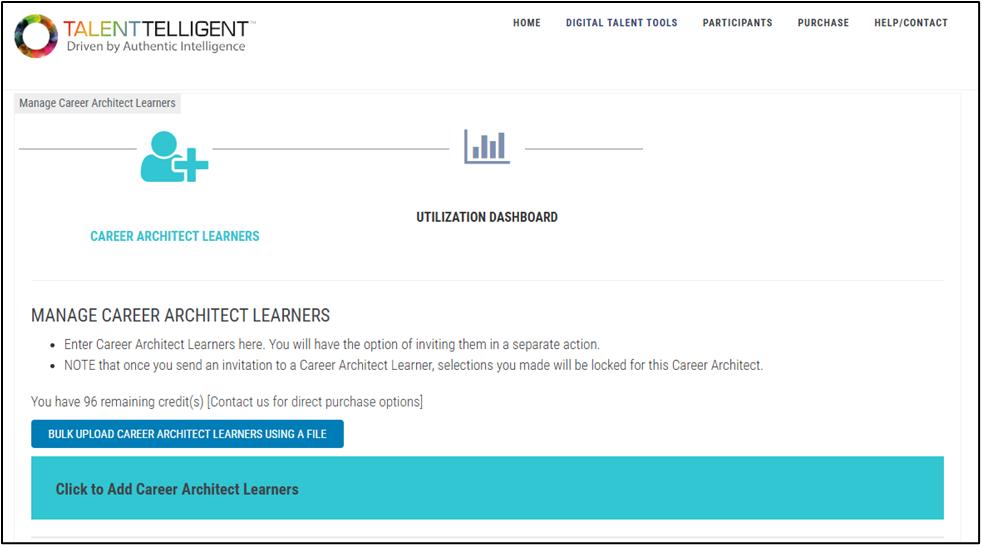
You may add Learners two ways:
- Bulk Upload Learners Using a File – Complete the .csv template and upload it. (Get the Learner upload template.)
- Add Individual Learner to Group – Add a single Learner manually.
Step 3: Utilization Dashboard #
Once Learners have been invited, you can navigate to the Utilization Dashboard.
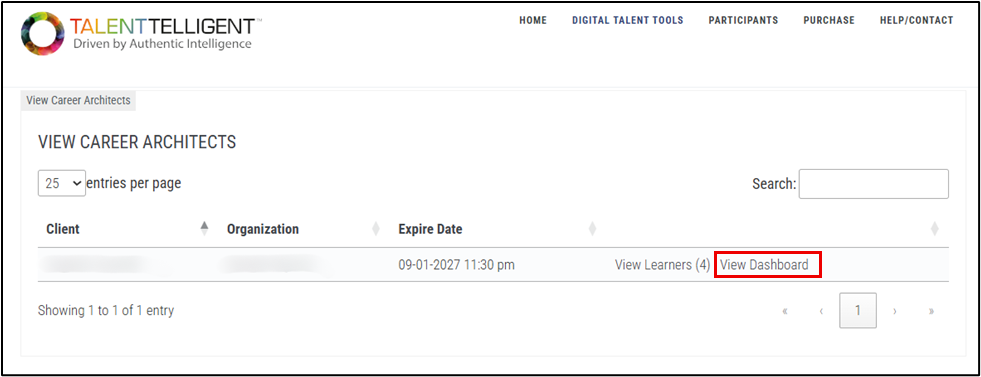
Go to Digital Talent Tools → Career Architect.
Select View Dashboard.
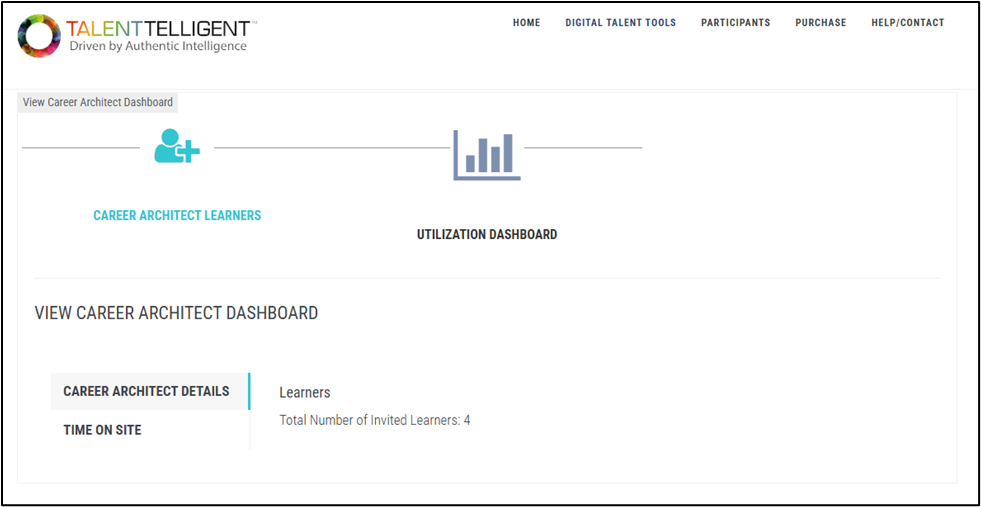
On the Utilization Dashboard page, there are two tabs:
- Career Architect Details – View how many learners have been invited to this Career Architect.
- Time On Site – View the total number of sign on’s, the group’s average time on site, and the time on site per each log on.
Using the Career Architect #
Users have multiple options to interact with the Career Architect:
- Select from pre-populated prompts.
- Type in the open field of the chat tool.
Users can customize their Career Architect experience by uploading a headshot or photo of their choice for inclusion in their chat experience.
In the Career Architect, go to Settings → Profile
On the Profile page, upload the new avatar, and select the Update Profile button.
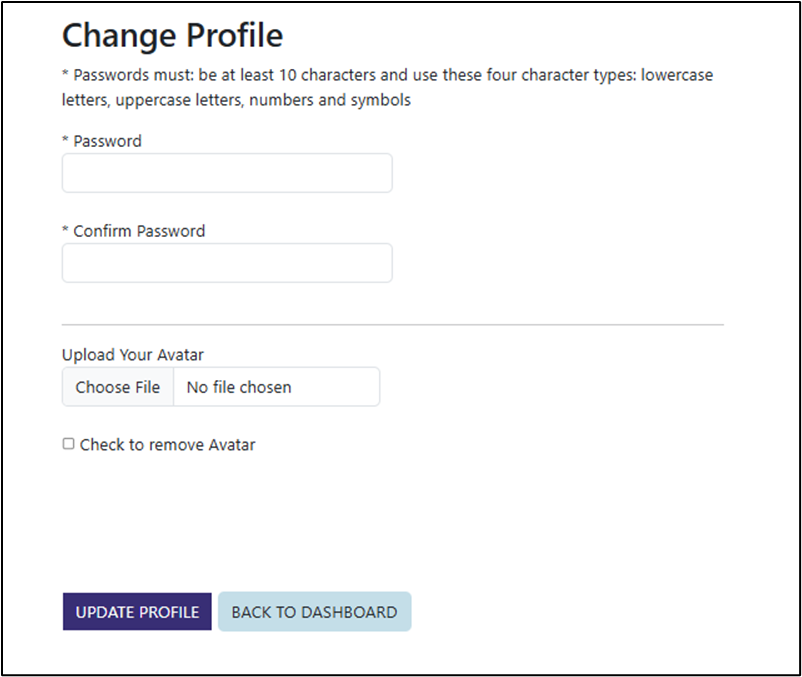
Users can also upload a maximum of three assessments to further personalize their Career Architect experience. Users can view their uploaded assessments at any time in the Uploaded Assessments section located directly below the Your Career Architect section. Upload assessments using the Upload PDF button.

Organizations can further customize their Career Architect’s appearance including the color scheme and the logo that appears in the experience.
Conclusion #
The Career Architect® provides users an interactive user experience with real-time feedback powered by the world’s largest database of development content. The Career Architect’s setup process is unique from other Qualified Administrator tools because the Career Architect must be designed and deployed by our team. Administrators can customize the Career Architect’s appearance to better align with their organization, and users can further customize their experience through their Career Architect’s Profile menu and by uploading assessments.