
- Introduction
- Step 1: Navigate to the Interview Guide Builder
- Step 2: Organization Page
- Step 3: Add Job Profile
- Step 4: Next Steps After Saving
- Step 5: Create Interview Guide Details
- Step 6: Select Roles and Practices
- Step 7: Enter Interviewers
- Step 8: Assign Questions and Generate Guide
- Step 9: Generate and Download the Interview Guide
- Step 10: Managing Existing Guides
- Conclusion
Introduction #
This documentation provides step-by-step instructions for setting up and using the Hello! Interview Guide Builder. It takes you through the entire process in sequence, beginning with creating a job profile and ending with generating a customized interview guide. By following these steps, you will learn how to configure, manage, and deliver structured guides that ensure consistency and professionalism throughout your organization’s interview process.
Step 1: Navigate to the Interview Guide Builder #
- From the main menu, go to Digital Talent Tools → Interview Guide Builder.
- This opens the Interview Guide Builder dashboard where you can begin creating custom guides.

Step 2: Organization Page #
- On the Organization page, you will see the option to manage job profiles and access supporting features.
- Available actions:
- Return to All Organizations – go back to the organization list.
- Click to Purchase More Interview Builder Credits – add credits if needed.
- Add Organization Job Profile – create a new job profile.
- View/Print Custom Interview Guide Help – open instructions for using the tool.
- Job profiles will appear in the table once created, with options to search, filter, and navigate pages.

Step 3: Add Job Profile #
- Clicking Add Organization Job Profile opens the setup form.
- At the top of the page, you can also use View Existing Jobs by Organization to review job profiles already created.
- Fill out the required information:
- Choose Organization (required) – Select the organization or add a new one.
- Choose Saved Profile – Use an existing profile if available.
- Job Profile Name (required) – Enter the role title, such as Software Engineer or Manager.
- Job Profile Unique Identifier – Optional code or requisition number for tracking.
- Job Profile Overview – A short description of the role.
- Job Profile Notes – Space for any extra details.
- Job Category / Custom Category – Select from the dropdown or create your own.
- Country / State / City / Org-Specific Location – Enter the job’s location details.
- When finished, click Add Job Profile to save.


Step 4: Next Steps After Saving #
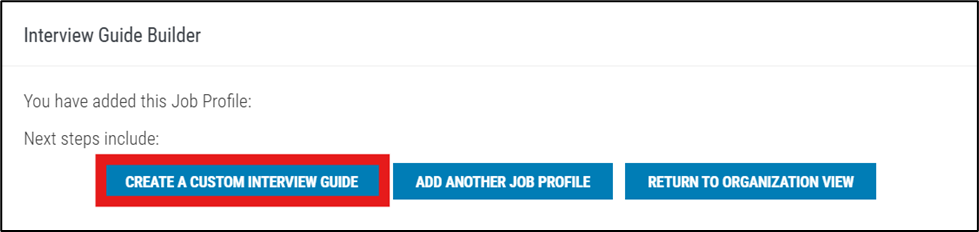
- Once the profile is saved, a confirmation screen will appear.
- The Qualified Administrator (QA) will see three options:
- Create a Custom Interview Guide – continue building a guide from this profile.
- Add Another Job Profile – create another profile if needed.
- Return to Organization View – go back to the dashboard.
- The QA should click Create a Custom Interview Guide to move forward.
Step 5: Create Interview Guide Details #
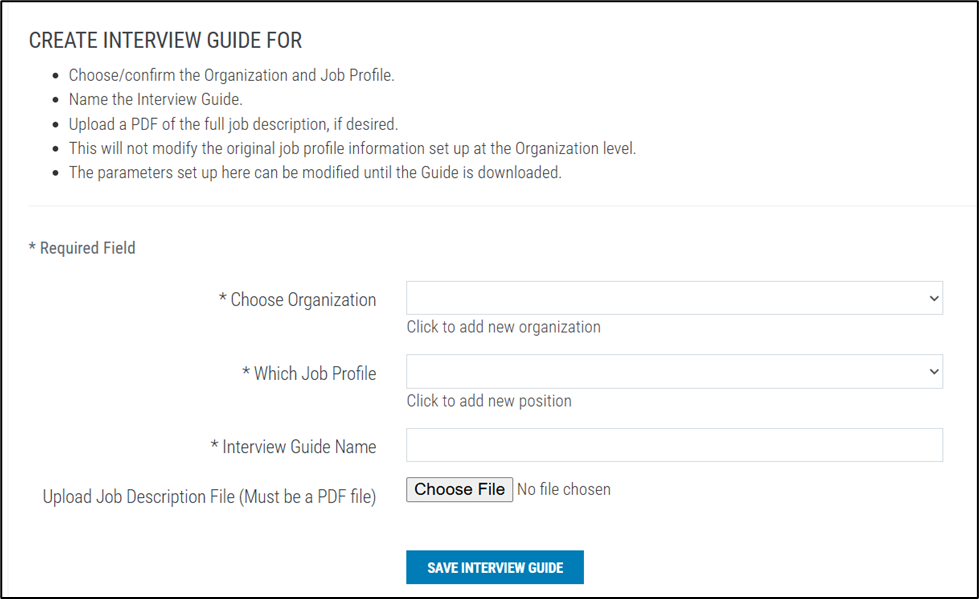
- The next screen prompts the QA to enter details for the Interview Guide.
- Fields include:
- Choose Organization (required) – select the organization the guide will belong to.
- Which Job Profile (required) – choose the saved job profile to link this guide to.
- Interview Guide Name (required) – provide a descriptive name for the guide.
- Upload Job Description File – optional, attach a PDF version of the job description for reference.
- After completing the fields, click Save Interview Guide to continue.
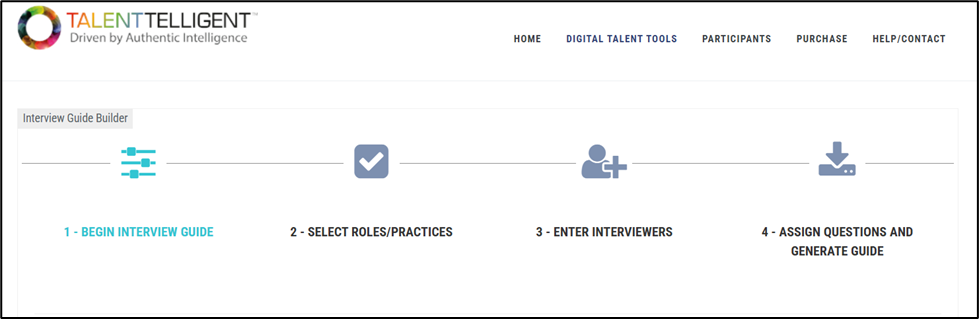
Step 6: Select Roles and Practices #
On this page, the QA selects which roles and practices will be included in the Interview Guide.
Instructions for QA:
- View the Roles & Practices
- Use the tabs at the top of the screen to switch between available libraries:
- KSA – Leaders
- KSA – Managers
- KSA – Individual Contributors
- Each library contains a list of roles (on the left) and practices (on the right).
- Use the tabs at the top of the screen to switch between available libraries:
- Select a Library
- Make sure the desired library tab is active.
- Click Select This Library to load its roles and practices into the selection area.
- To change libraries, first click Clear Selected Library, then choose a new one.
- Choose Roles
- Roles are listed with descriptions (e.g., Establishing a Competitive and Compelling Vision, Managing an Effective and Agile Plan Execution).
- Check the boxes next to the roles you want to include in the Interview Guide.
- Choose Practices
- Practices are also displayed with descriptions (e.g., Self-Management, Achievement Drive, Leading Change and Transitions).
- Check the boxes next to the practices you want to include.
- Save Your Selection
- After making your choices, click Save Selected Roles/Practices.
- This saves the subset of roles and practices that will be used when generating the Interview Guide.
Note: This selection is not final until the finished Interview Guide is generated. You can adjust the roles and practices later if needed.
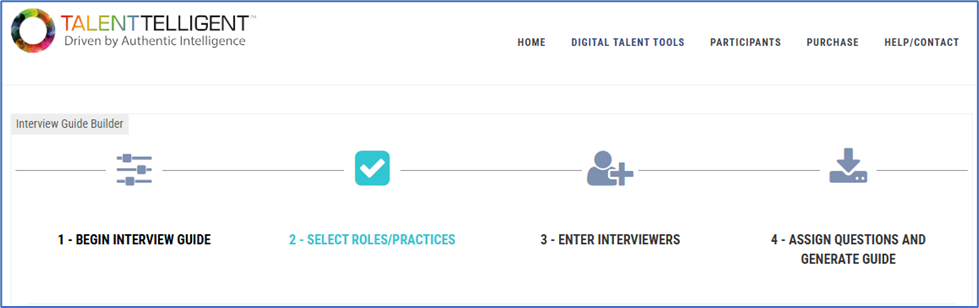

Step 7: Enter Interviewers #
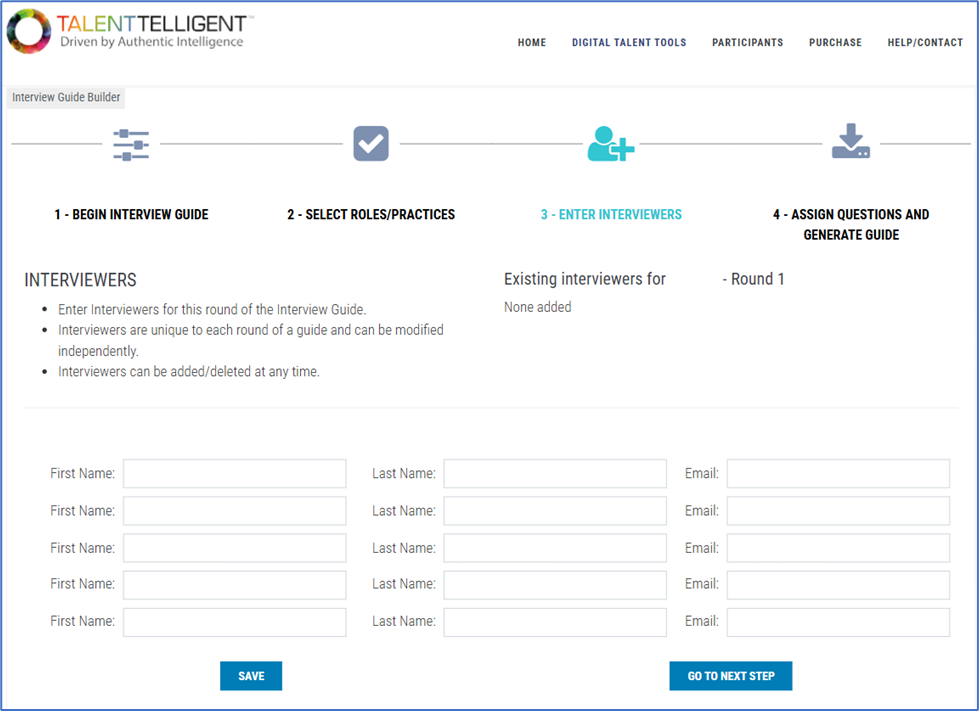
On this page, the QA enters the list of interviewers who will participate in this round of the Interview Guide.
Instructions for QA:
- Add Interviewer Information
- Enter the First Name, Last Name, and Email for each interviewer in the provided fields.
- Multiple interviewers can be added at once (up to five at a time in the fields shown).
- Unique to Each Round
- Interviewers are assigned separately for each round of the Interview Guide.
- This means the list can differ from round to round, depending on who is conducting interviews.
- Modify Anytime
- Interviewers can be added or removed at any time.
- The “Existing Interviewers” list (on the right) will display those already saved for this round.
- Save
- After entering interviewer details, click Save.
- Continue
- Once interviewers are saved, click Go to Next Step to proceed.
Step 8: Assign Questions and Generate Guide #
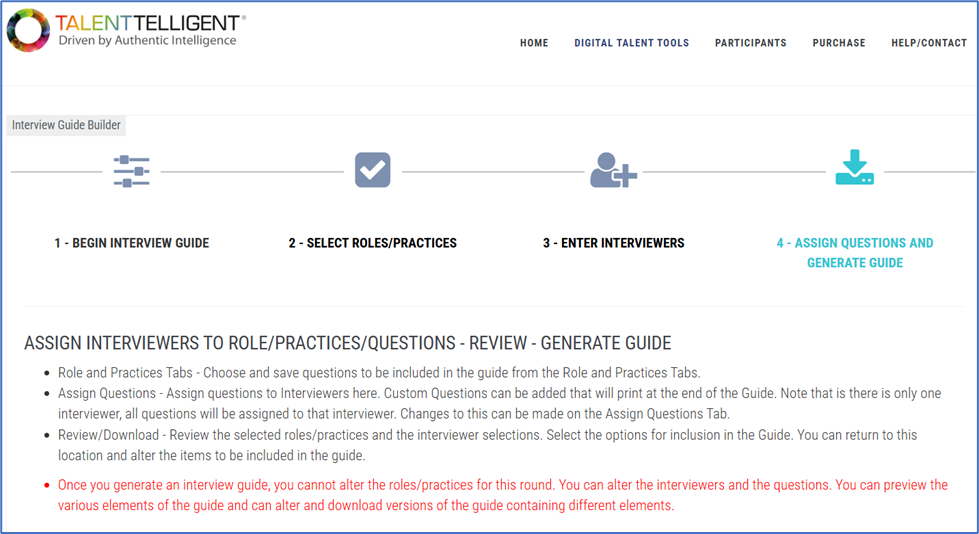
In this step, the QA assigns questions to the interviewers based on the roles and practices chosen in Step 6. The system will only display the specific roles and practices previously selected.
Important Note: Once the interview guide is generated, you cannot change the roles or practices for this round. You can still edit interviewers and questions, but the role and practice choices are locked.
Part A: Roles #
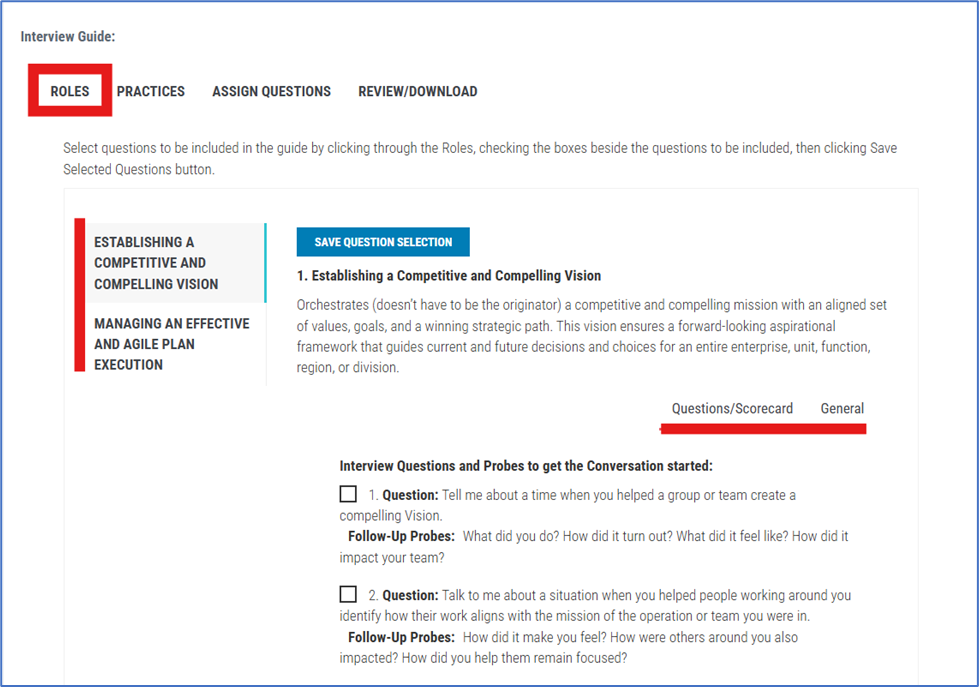
- Role Availability
- Only the roles selected in Step 6 will appear in the Roles tab.
- Each selected role provides:
- A role overview.
- Suggested interview questions and follow-up probes.
- Evaluation indicators (negative and positive).
- A “General” section for deeper context.
- Questions/Scorecard Tab
- Contains the behavioral interview questions for the role.
- Each question has follow-up probes to guide discussion.
- Includes the scoring framework (negative vs. positive indicators).
- General Tab
- Explains the “Deeper Understanding of the Role.”
- Outlines key leadership responsibilities, expectations, and guiding principles.
- Helps interviewers align the questions with the broader purpose of the role.
- Selection Process
- Check the boxes for the questions you want included in the guide.
- Save by clicking Save Question Selection.
Part B: Practices #
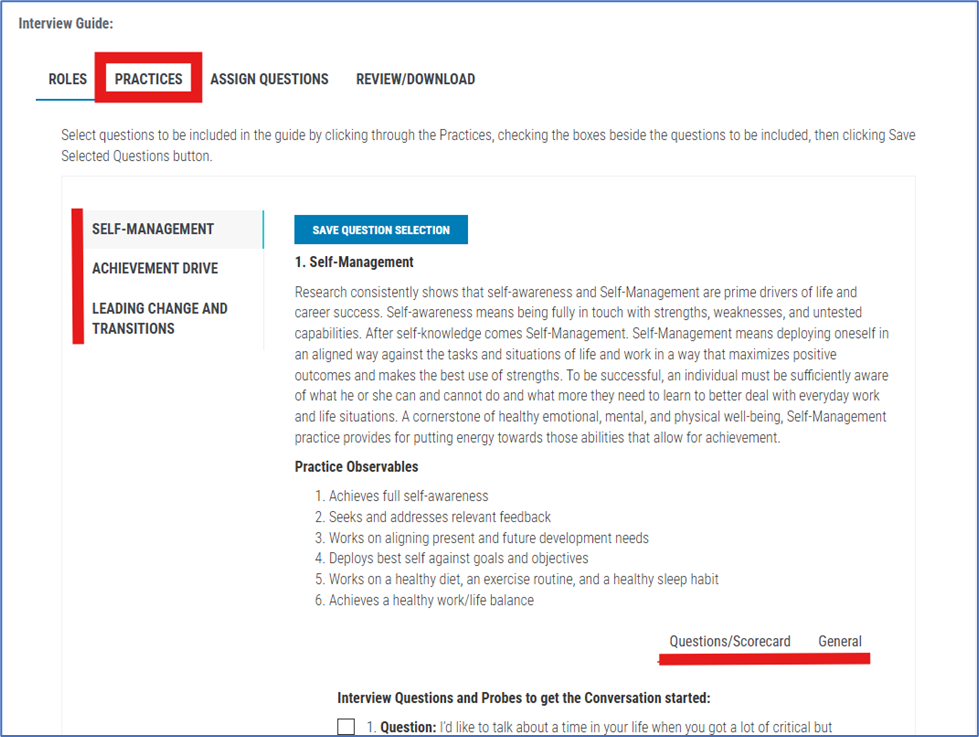
- Practice Availability
- Only the practices selected in Step 6 will appear in the Practices tab.
- Each selected practice includes:
- A description of the practice.
- Observable behaviors.
- Interview questions with follow-up probes.
- A “General” section with deeper context.
- Questions/Scorecard Tab
- Provides practice-specific interview questions and probes.
- These are designed to assess behaviors tied to the practice.
- General Tab
- Offers additional insights into the practice.
- Often includes Practice Observables, describing what effective demonstration looks like in action.
- Helps interviewers evaluate responses more accurately.
- Selection Process
- Choose questions to include in the guide by checking the boxes.
- Save selections with Save Question Selection.
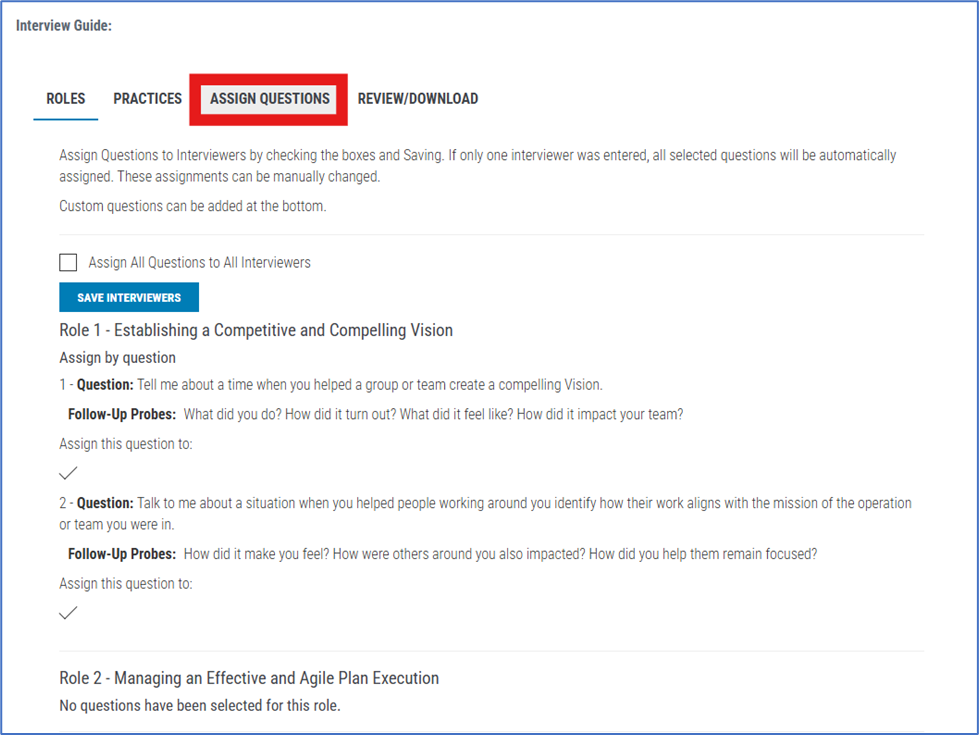
Part C: Assign Questions #
- Access the Assign Questions Tab
- Click the Assign Questions tab.
- The system displays all the roles and practices that were chosen in Step 6.
- Each role and practice expands to show the questions you selected in their respective tabs.
- Assign by Interviewer
- For each question, the system lists all interviewers entered in Step 7.
- Use the checkboxes to assign a question to one or more interviewers.
- If there is only one interviewer, all questions are automatically assigned to them.
- Assign All at Once
- To distribute all questions to every interviewer simultaneously, select the Assign All Questions to All Interviewers option.
- Custom Questions
- At the bottom of the page, you can add custom questions.
- Type the custom question into the provided field and select which interviewer(s) should receive it.
- Multiple custom questions can be added and assigned.
- Save Assignments
- After distributing questions, click Save Interviewers.
- This saves all assignments for both standard and custom questions.
Example: For the role Establishing a Competitive and Compelling Vision, each selected question displays with follow-up probes. Next to each question, you can check boxes to assign it to specific interviewers.
Part D: Review/Download #
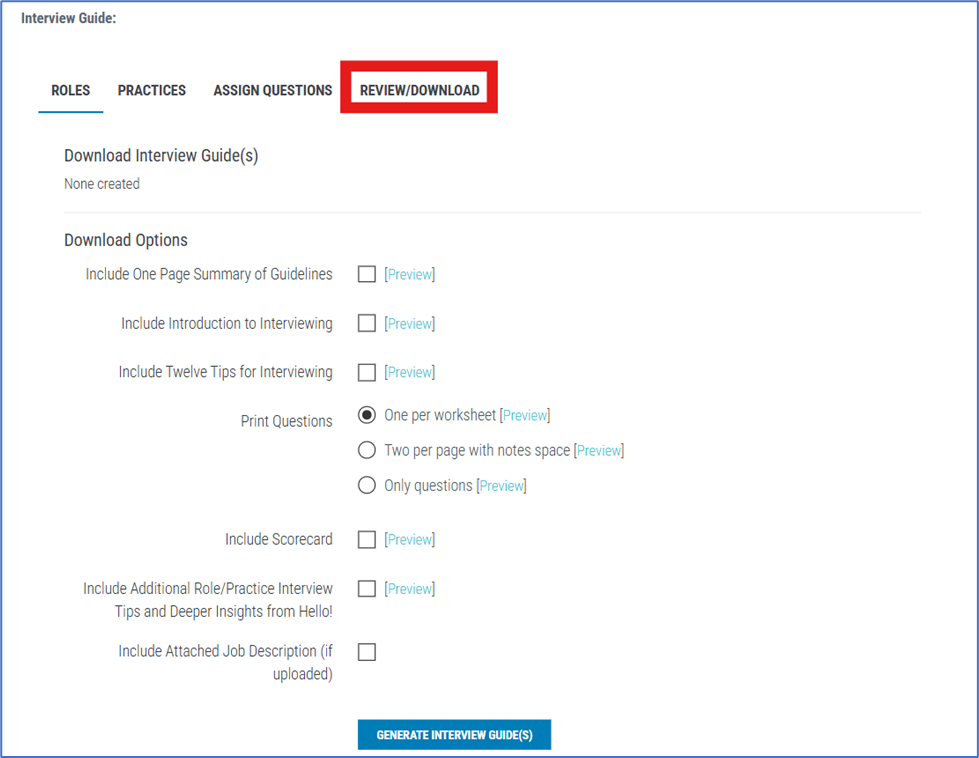
- Access the Review/Download Tab
- Click on the Review/Download tab to see a summary of your Interview Guide.
- This section provides options for previewing and downloading the guide before it is finalized.
- Download Options
- Choose what to include in the final Interview Guide by checking the boxes.
- Options include:
- One Page Summary of Guidelines.
- Introduction to Interviewing.
- Twelve Tips for Interviewing.
- Print Questions (one per worksheet, two per page with notes space, or questions only).
- Scorecard.
- Additional Role/Practice Interview Tips and Deeper Insights.
- Attached Job Description (if one was uploaded earlier in Step 5).
- Each option has a Preview link so you can review the format before generating the guide.
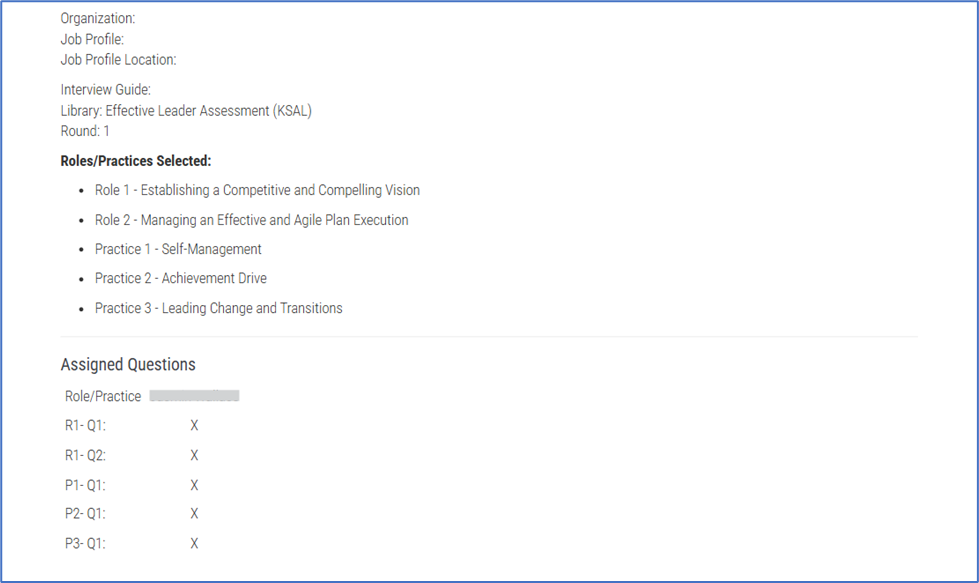
- Guide Summary
- Below the download options, the system lists:
- Organization, job profile, guide name, library, and round.
- The roles and practices selected.
- Assigned questions for each role/practice, with the corresponding interviewer(s).
- Below the download options, the system lists:
- Generate the Interview Guide
- Once satisfied with the selections and layout, click Generate Interview Guide(s).
- This produces the final guide in the chosen format, ready for use in interviews.
Step 9: Generate and Download the Interview Guide #
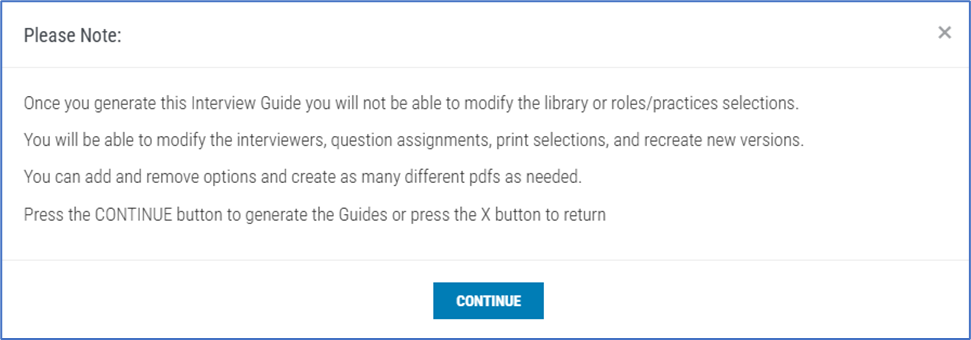
- Confirmation Message
- After clicking Generate Interview Guide(s), a confirmation window appears.
- This message explains:
- You cannot change the library or roles/practices after the guide is generated.
- You can still edit interviewers, question assignments, and print selections.
- You can create new versions and generate multiple PDFs as needed.
- To continue, click Continue. To cancel, click the X in the top corner.
- Download Options Page
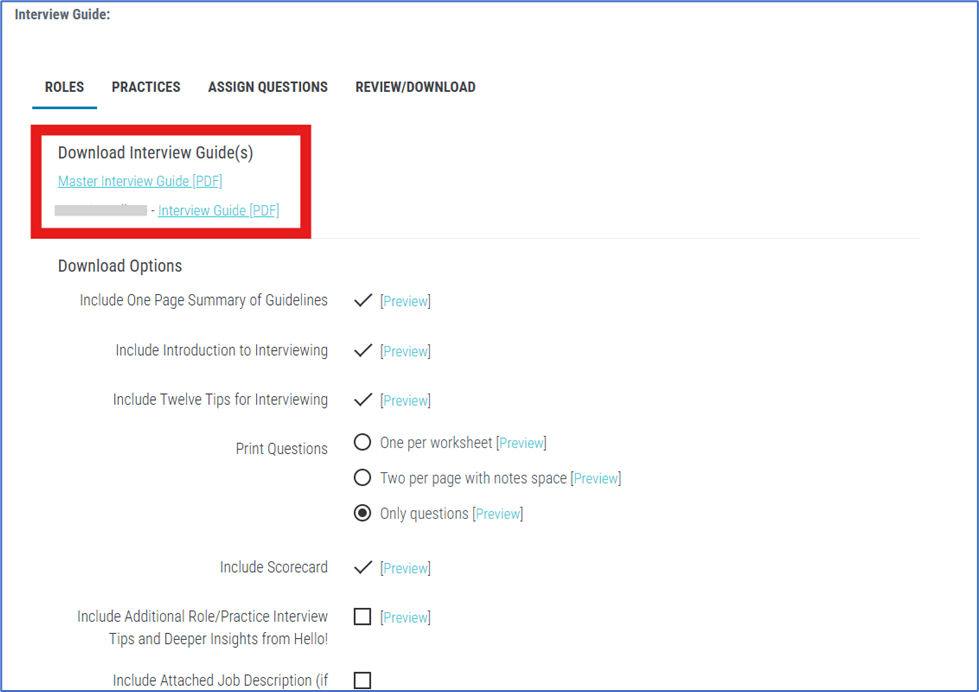
- After continuing, the system takes you back to the Review/Download tab with the generated guide(s) now listed.
- Download links appear, such as:
- Master Interview Guide [PDF] – includes all selected content.
- Individual Interviewer Guides [PDF] – customized versions for each interviewer.
- Download Options
- You can still choose which extra materials to include by checking boxes (e.g., guidelines, tips, scorecard).
- Options include multiple print formats for questions (one per worksheet, two per page with notes, or questions only).
- Use the Preview links to confirm formatting before downloading.
- Download the Files
- Click the PDF links to download either the master guide or interviewer-specific versions.
- These can then be printed or shared digitally with interviewers.
- Note: The system does not automatically send guides. The QA is responsible for distributing them to interviewers via email, shared drives, or printed copies.
Step 10: Managing Existing Guides #
- Accessing Previously Generated Guides
- Once an Interview Guide is created, it will remain available in the Review/Download tab.
- From here, the QA can re-download the Master Guide or any Interviewer-Specific Guides at any time.
- Making Updates
- Roles/Practices: These cannot be changed for the current round once the guide has been generated. If different roles or practices are needed, a new guide must be created from the beginning.
- Interviewers and Question Assignments: These can be updated. After adjustments, regenerate the guide to produce an updated PDF.
- Print/Download Options: You can always modify what content is included (guidelines, tips, scorecards, etc.) and re-download new versions.
- Creating New Versions
- To make significant changes, (e.g., selecting different roles/practices), start a new Interview Guide by going back to Step 1.
- This ensures flexibility in supporting different positions, rounds, or interview scenarios without overwriting the original guide.
- Archiving and Sharing
- Store downloaded PDFs in a secure, organized folder (e.g., grouped by position, date, or round).
- When ready to distribute, follow the same process noted in Step 9: share guides with interviewers via email, shared drives, or printed copies.
- This ensures all interviewers receive the correct version of the guide before the interview process begins.
Conclusion #
The Hello! Interview Guide Builder provides your organization with the tools to run structured, fair, and effective interviews. By creating guides that align with job profiles, role expectations, and organizational practices, you ensure that every candidate is evaluated consistently.
With clear steps for building, managing, and distributing guides, the process supports both interviewers and candidates, promoting professionalism and confidence at every stage.
By following this documentation, your hiring teams can deliver a consistent, branded interview experience that strengthens decision-making and leads to stronger hiring outcomes.